#
Segment
Aggregations.io enables you to monitor and utilize your Segment data in real time. When combined with the Grafana plugin, you can visualize and alert on your Segment analytics events with ease.
#
Prerequisites
To set up this integration you'll need to first:
- Set up an ingest using the
Array of JSON Objectsschema. - Create an API Key with
Writepermissions to use with this integration. We'd recommend creating a dedicatedOrg-WideAPI Key. - A segment account with incoming data sources.
#
Setting up the destination
#
1 - Add a new Aggregations.io (Actions) destination
Navigate to your organization's Destinations page on Segment and choose Add Destination
Search for Aggregations.io and select it.
If you can't find it in the search results, you need to navigate directly to the destination page by replacing your {WORKSPACE} in the url below:
https://app.segment.com/{WORKSPACE}/destinations/catalog/actions-aggregations-io
Click the Add Destination button
#
2 - Select data source
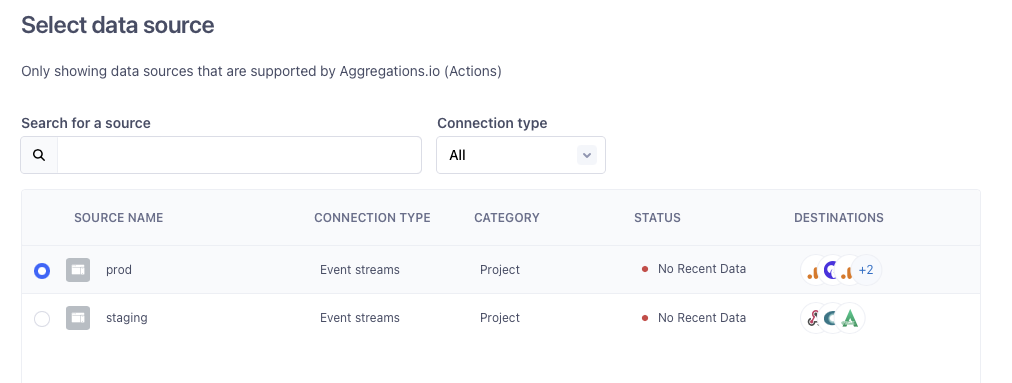
Choose the relevant data source whose events you want to utilize in Aggregations.io.
info
If you have multiple sources, you'll need to follow this guide for each. You can opt to utilize the same ingestion & API keys across multiple Segment sources, or create separate ones for isolation. In most cases, reuse makes sense for consistency and simplicity.
#
3 - Name your Destination

Give your destination a useful name like Aggregations.io
If you are creating multiple destinations for different sources but want to utilize the same settings, you can choose to copy them at this step.
#
4 - Destination Settings
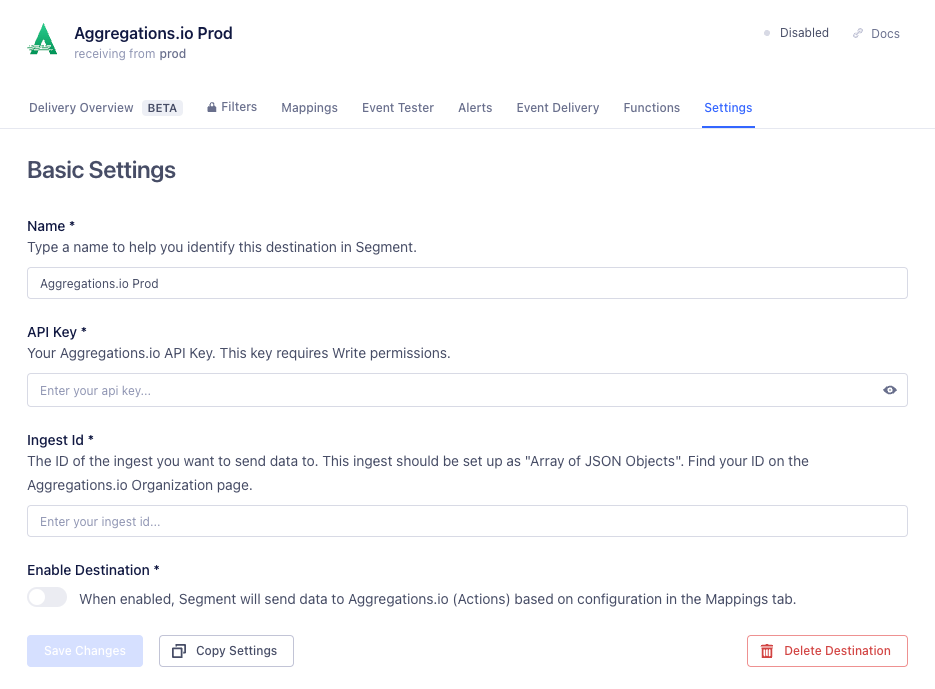
Enter your API Key and Ingest Id.
- Your API Key requires
Writepermissions.- Learn more about creating a new API Key here.
- Your ingest needs to be set up as
Array of JSON Objects.- You can find your Ingest Id on your Organization Page
- Learn more about ingest setup here.
While setting up and testing your destination, you should leave the destination disabled.
#
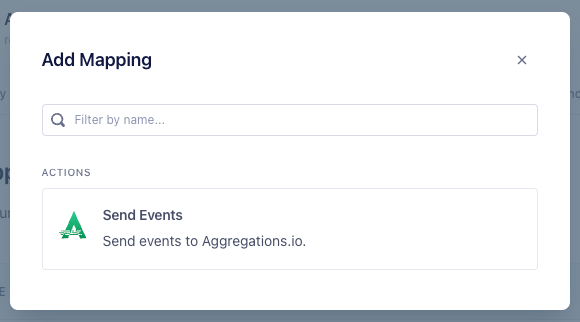
5 - Mappings
Click on the Mappings tab and choose + New Mapping

Choose Send Events from the Actions list
#
6 - Mappings, Selecting events
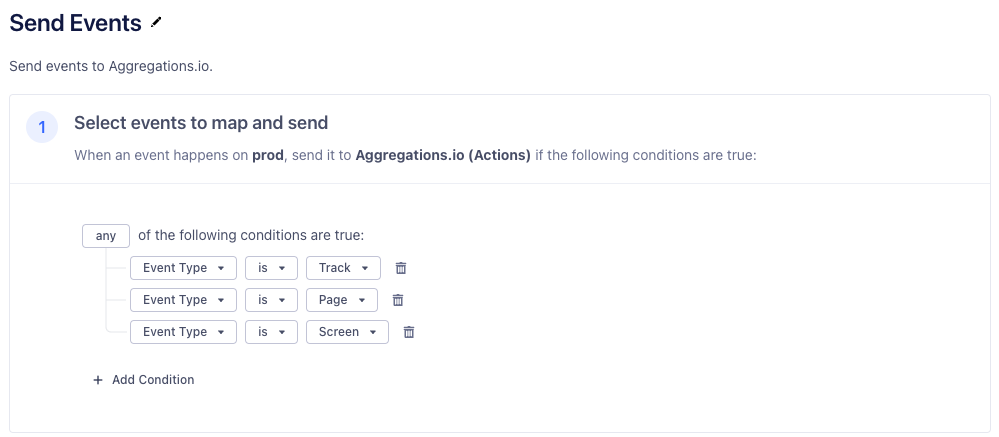
Select your filter settings, if you want to restrict the data flowing into Aggregations.io. Segment has made this functionality very powerful, see their guide here to understand the full capability.
For our example, we know we want to count just Track, Page and Screen events, so that's what we select.
#
7 - Mappings, Test event
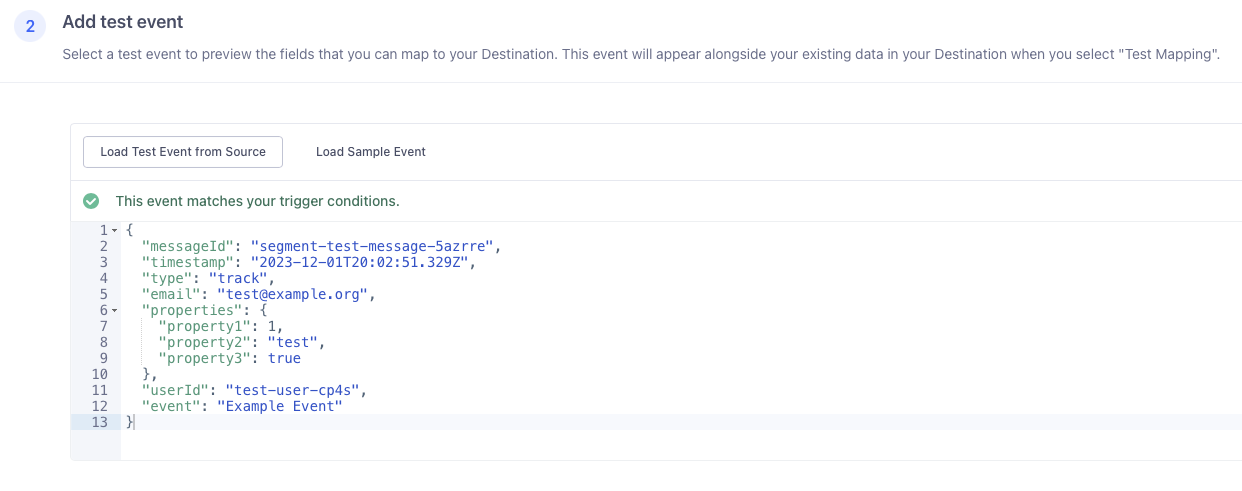
Scroll to section (2) and either load a test event from your Segment setup or just load a sample event.
#
8 - Mappings, Selecting mappings
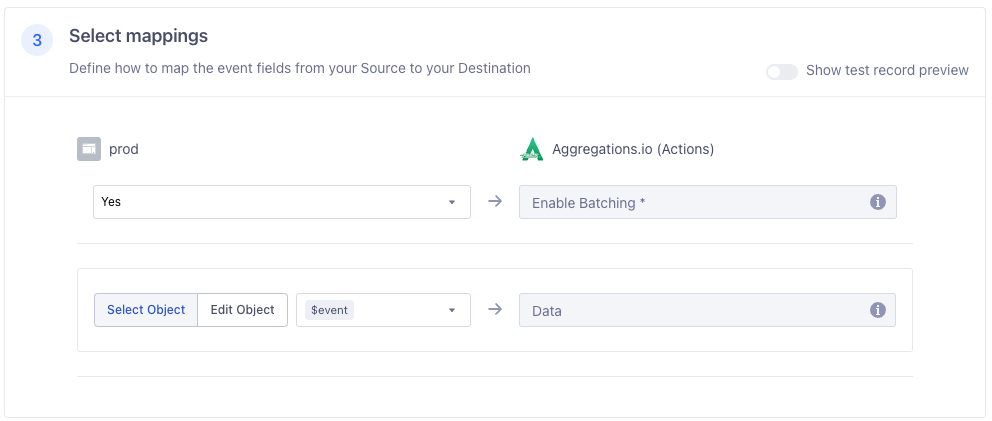
Scroll to section (3) and adjust any necessary settings.
By default, batching is enabled and the entire event payload is sent. You can use these settings to customize the payload or disable batching (not recommended).
#
9 - Mapping, Test Mapping
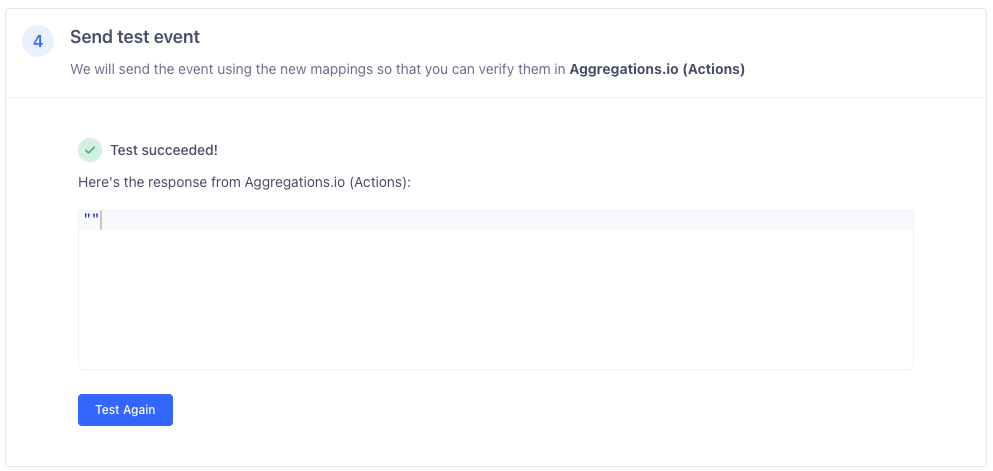
Assuming the above steps are filled in, your Test Mapping button should be enabled. Click it!
If not, review the steps above to ensure you have mapped all the fields and you have a test event set up.
If your test succeeds, you should get back an empty payload.
If there is an error, see below.
#
Enabling the destination
It is important to ensure both the destination and mapping are enabled within Segment.
- Enable the Destination on the
Settingstab - Enable the Mapping on the
Mappingstab
#
Timestamps
When setting up an ingestion to use with Segment, you may want to rely on one of Segment's timestamps instead of the Use Ingest Timestamp option.
You'll want to be careful to choose on of Segment's non-client-authoratitive timestamps like receivedAt in order to ensure it's a correct format. See Segment's docs on timestamps here.
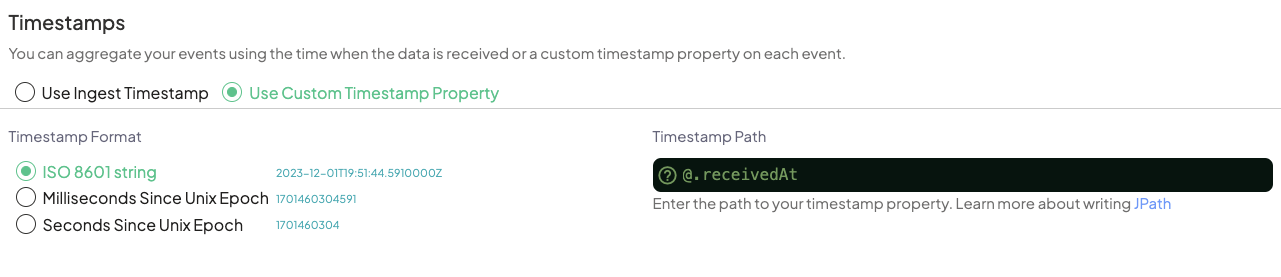
To utilize receivedAt when setting up your ingest:
- Choose
Use Custom Timestamp Property - Set
Timestamp FormattoISO 8601 String - Set
Timestamp Pathto@.receivedAt
#
Troubleshooting
#
Error Codes
See the Ingest Docs for common errors ingesting events.
#
Reversed headers
If you receive an error indicating No Authorization Header it may indicate you've reversed the API Key value and header name
#
Extra headers
If you accidentally add an extra blank header in the mapping you may receive an error is not a legal HTTP header name, simply delete the extraneous header.